 Cameraphones may be everywhere these days – they’re certainly convenient and their quality keeps improving rapidly. But if you’re off travelling to – and taking pictures of – interesting parts of the world, you still owe it to yourself to not leave your memories entirely to phones with all their limitations when DSLR cameras do the job so much better. And furthermore, even if you’re not a pro photographer – or even a dedicated amateur – you can still pull off some surprisingly fancy and sophisticated moves with the help of a little technique as well as an add-on gadget or two.
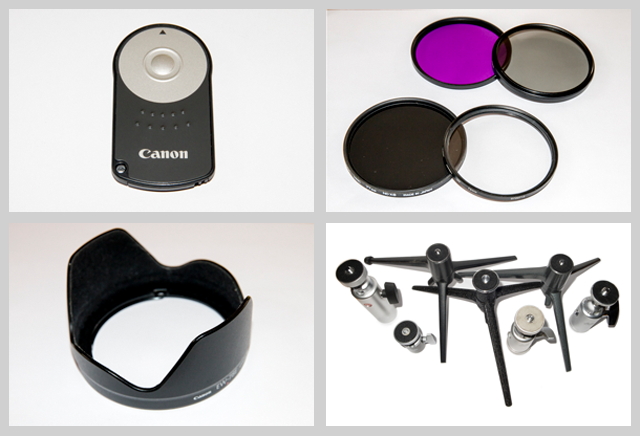
In fact, if I had to choose just four, it would be this quartet – compact, affordable, and easy to use, yet worth well beyond their weight in travel photography gold. First is a remote control shutter release (top left), a wee device that will add a new dimension to your photos and will probably be the best £10 (US$17) you’ll ever spend on camera equipment. It’s often used with a tripod – and a fold-up mini tripod is perfect for travel (these will generally run you £15/$25). Throw in a lens hood (£9/$15) and a couple of lens filters (£9/$15), too, such as a neutral density filter and circular polarising filter. They’re easy to carry, protect your lenses, and can transform your shots in-camera, just like a pro.
(One caveat: Make sure you buy the right remote shutter release for your camera model and the right size of lens hoods – it’s best to buy ones made by your camera brand. Lens filters should also be the correct size for your lens and often come in packs – look for UV – Ultraviolet, ND – Neutral Density and CPL – Circular Polariser. Vivitar filters are an inexpensive way to start. Hoya filters are the next grade up.)
OK, now that we’ve got the gear, here’s how we put it to work for us in some key situations:
1. Movement of People
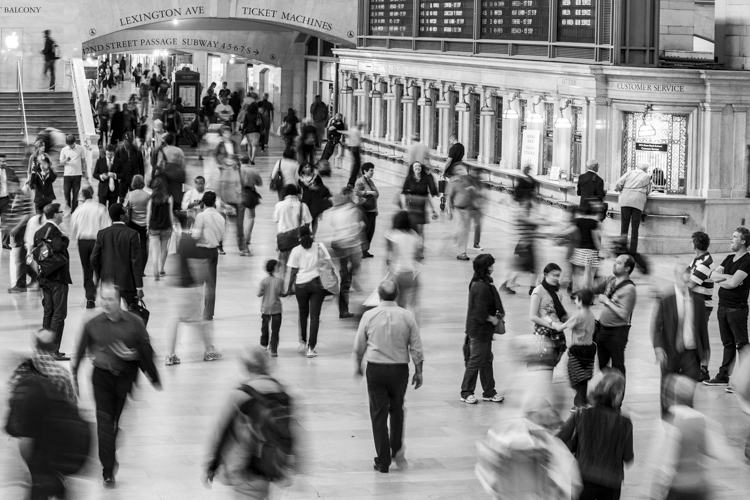
Convey the hustle and bustle of railway stations or crowded malls by blurring the motion of people. Use a remote shutter release and a shutter speed of a fraction of a second – enough to suggest movement without making those rushing around appear too ghostly. From high up, try to capture an effective contrast between some people on the move down below and a stationary group or still person dressed or standing differently or wearing a standout colour.
2. Sunrise, Sunset
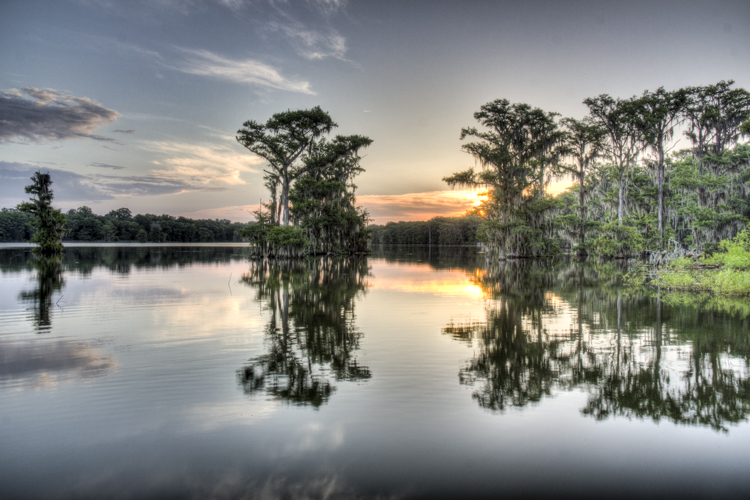
Using a remote-control shutter release with low ISO (the number that measures sensitivity to available light) is ideal when taking advantage of colourful skies in tricky low light, especially during the “blue hour” (just before sunrise and just after sunset) and the “golden hour” (just after sunrise and just before sunset). For better-quality shots, make sure the camera is stable and choose a vista – such as a harbour scene – worthy of getting up early or watching the sun go down.
3. Light Trails
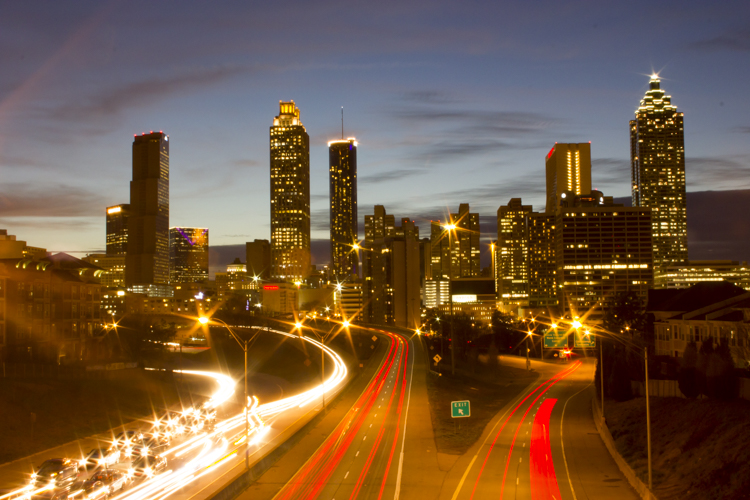
Streams of light trails created by traffic headlights and taillights captured at slow shutter speeds can transform a cityscape. Find somewhere safe to set down the camera where traffic passes by, preferably at evening rush hour, set a midrange aperture (try f6.3 to f11) and consider using a lens hood to cut out flare from nearby street lamps. Set the lens to manual focus and try a shutter speed – fired remotely – between 5 to 20 seconds to really create a sense of motion.
4. Waterfalls
To shoot water flowing over rocks and smooth out the water, you’ll need a longer-than-normal exposure and often a small aperture (high f stop). If the waterfall scene isn’t dark enough to allow a slow shutter speed, use a neutral-density (ND) filter to decrease light. Bring a lens cloth in case of spray. ND filters can also be used to turn clouds into streaks across the sky, adding a touch of drama to an image.
5. Wildlife Photos
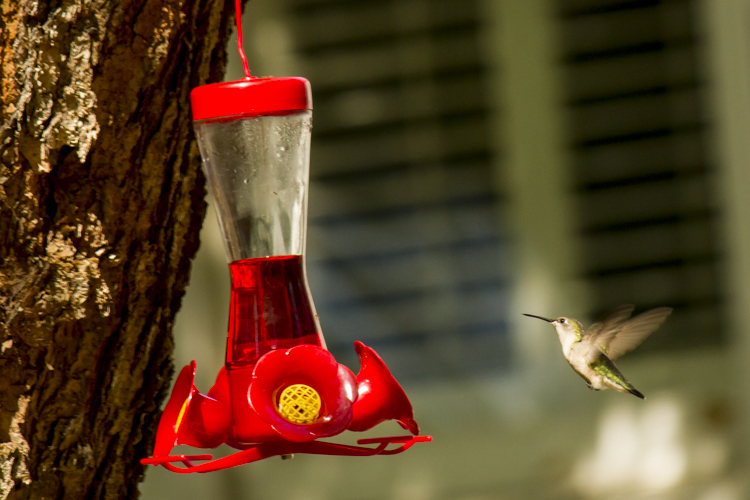
In wildlife photography, it’s best to keep still and keep your camera still. If you expect a bird to visit a nearby bird feeder, set up and aim the camera beforehand, on silent, continuous shooting mode with a fast shutter speed. With a remote shutter release, you don’t have to be near the camera and you’ll be glad that the sudden excitement of shooting a creature in action won’t cause camera shake this time. Again, use a circular polarising filter to keep detail in the sky.
6. Dim Interiors
A camera’s built-in flash can wash out colours in the foreground and can only stretch so far to the background. To capture the way natural light filters through a window into a building like a church or castle, turn off the flash and use a tripod or set the camera down somewhere stable and use the remote shutter release. Use the same trick in museums or places where flash is not permitted.
7. Blue Skies
There’s often a play off between capturing detail in a landscape or buildings versus detail in a much lighter sky. A circular polarizing filter lets you have your cake and eat it by darkening the sky and keeping its colours and cloud shapes. A filter also protects the lens but be careful to keep both lens and filter dust free.
8. High Dynamic Range
For the best HDR shots, the camera has to be as steady as possible, so a tripod is ideal, used with a remote shutter release. Check if your camera has an HDR function. If not, use triple exposure bracketing to slightly underexpose and overexpose and merge with HDR software like Photomatix to make the colours in the shadows of a landscape really pop.
9. Flower Photos
Wait if possible for soft, overcast light to close in on the petals of a flower to reduce contrast when capturing colour and shape. With lower light you’ll need a slower shutter speed, but don’t go too low. With wide apertures (low f stops) that focus on part of the flower or an insect, using a tripod and remote shutter release is a good idea to keep focus in a narrow depth of field. Extension tubes will get you even closer. Try to block out a breeze, but don’t cast a shadow.
10. Selfie!
We live in the age of the selfie, but messing about with a self-timer can be hit and miss when you’re the subject of a photo. A remote shutter release is ideal for shots of a group (with you included) in front of the Sagrada Familia or jump photos at an Ibiza sunset. Choose the right backdrop, set the camera down low and tilted up (a mini tripod is the way to go), frame and focus, switch the lens to manual, get in front of the camera, button ready and jump!
Lee Howard is a New York-based freelance journalist and photographer from the U.K. whose work has appeared in the Guardian and National Geographic. He writes about film, tv, music and travel and blogs about his travels across the USA at WayInto.com.
images | Lee Howard except for tripods wolf4max


